DIY projects bring joy to millions of homeowners every year. You pick up tools and turn simple ideas into real creations. A jig saw stands out as one of the most versatile power tools you can own. It cuts curves, straight lines, and intricate shapes in wood, metal, and plastics with ease.
According to the Harvard Joint Center for Housing Studies, nearly 30% of U.S. homeowners completed at least one improvement project in recent years. Moreover, total home improvement spending exceeded $526 billion in 2024. These numbers show how popular DIY work has become.
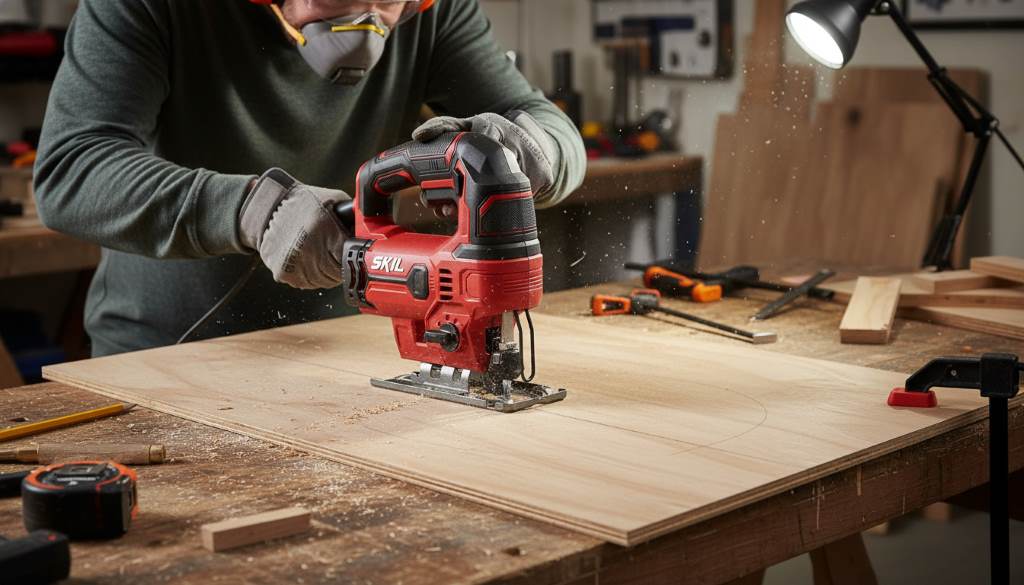
If you want a reliable tool to get started, check out this DIY jig saw guide for a solid corded option. This article walks you through everything you need to know about using a jig saw safely and effectively in your projects.
What Is a Jig Saw and Why Choose It for DIY?
A jig saw cuts with a thin blade that moves up and down quickly. You guide it freehand or along a line for precise results. Unlike circular saws that excel at long straight cuts, jig saws handle curves and details better.

Homeowners love jig saws because they work on many materials. You cut plywood for shelves one day and plastic for custom signs the next. Corded models deliver steady power, while cordless ones offer freedom to move around.
Furthermore, jig saws stay lightweight and easy to control. Beginners find them less intimidating than larger saws. As you gain confidence, you tackle complex shapes that other tools cannot manage. This flexibility makes a jig saw essential in any DIY toolkit.
Choosing the Right Jig Saw for Your Needs
You find many jig saw models on the market today. Corded versions provide consistent power without battery worries. They suit long sessions in your workshop. Cordless jig saws run on rechargeable batteries and let you work anywhere.
Look for variable speed controls. These let you adjust the blade speed for different materials. Slower speeds work best for metals, while faster ones cut wood quickly. Orbital action settings add aggression to cuts and speed up work in soft materials.
Additionally, check the base plate. Tool-free blade changes save time and frustration. LED lights help you see cut lines in dim areas. Dust blowers keep your line visible by clearing sawdust. Comfortable grips reduce hand fatigue during extended use.
Finally, consider stroke length and amps or voltage. Higher amps in corded models or higher voltage in cordless ones handle tougher jobs. Balance power with weight for your comfort.
Essential Safety Gear and Practices
Safety comes first every time you pick up a power tool. Jig saws can cause serious injuries if you ignore basic rules. The Occupational Safety and Health Administration notes that handheld saws lead to hand and finger injuries from point-of-operation contact.
Always wear safety glasses to protect your eyes from flying debris. Ear protection guards against loud noise during long cuts. A dust mask prevents you from breathing in fine particles, especially when cutting treated wood or plastics.
Furthermore, secure your workpiece with clamps. This keeps it stable and frees both hands to control the saw. Never force the blade. Let the tool do the work at its own pace. Unplug corded saws or remove batteries from cordless ones before changing blades or making adjustments.
Keep your work area clean and well-lit. Loose cords trip you, and poor lighting leads to mistakes. Avoid loose clothing or jewelry that might catch in the blade. These simple steps prevent most accidents and let you enjoy your projects safely.
Understanding Jigsaw Blades: Types and Uses
Blades make all the difference in your cuts. You choose the right one for clean results and longer blade life. High-carbon steel blades cut wood and plastics flexibly. Bi-metal blades combine strength and durability for mixed materials.
Teeth per inch matter greatly. Fewer teeth, around 6 to 10, remove material fast in rough cuts. More teeth, 14 to 24, give smoother finishes in fine work. Reverse-tooth blades cut on the downstroke and reduce splintering on top surfaces.
For wood, use blades designed for fast or clean cuts. Metal requires finer teeth to avoid overheating. Laminate blades have special designs to prevent chipping. Specialty blades handle ceramics, fiberglass, and even flush cuts against surfaces.
Moreover, shank types include T-shank and U-shank. Most modern jig saws accept T-shank blades for quick changes. Always match the blade to your material and desired finish. Experiment with a few types to find what works best for your projects.
Related:
How to Select the Best Portable Electric Scissors for Home Use
Makita XDT19Z 18V Brushless Impact Driver Review: Power, Speed and Performance
Preparing Your Workspace and Material
Good preparation leads to better results. Start by clearing your work area of clutter. Secure a sturdy bench or table that won’t wobble. Good lighting helps you follow cut lines accurately.
Mark your lines clearly with a sharp pencil or marking knife. Use a straightedge for straight cuts and templates for curves. Tape over the line with painter’s tape to reduce splintering on plywood or veneers.
Additionally, support large pieces properly. Overhanging material vibrates and causes rough cuts. Use sawhorses or roller stands for extra length. Drill starter holes for internal cuts so you plunge the blade safely.
Check your jig saw settings before starting. Adjust speed and orbital action for the material. Test on scrap wood first. This practice saves material and builds your confidence.
Basic Cutting Techniques Every Beginner Should Master
Start with straight cuts to build skills. Guide the saw steadily along your marked line. Keep the base plate flat against the material. Move slowly for control and accuracy.
For curved cuts, follow your line smoothly. Turn the saw gently without forcing it. Sharp turns need narrow blades to avoid binding. Practice on scrap to get the feel of steering the tool.
Plunge cuts begin inside the material. Tilt the saw forward until the blade tip touches. Lower it slowly while the blade runs until the base sits flat. This technique works great for sink cutouts or speaker holes.
Furthermore, bevel cuts tilt the base for angled edges. Loosen the base plate and set your angle. Practice on scrap to maintain consistent angles. These basics open many project possibilities.
Step-by-Step: Making a Perfect Circle Cut
You often need circles in DIY work. Follow these steps for clean results.
- Draw your circle with a compass or template.
- Drill a starter hole just inside the line.
- Insert the blade and position the saw.
- Cut slowly while rotating the material or walking around it.
- Sand edges smooth after cutting.
Support the cutoff piece to prevent binding as you finish. Use a circle-cutting jig for repeated accuracy. This method creates perfect tabletops or decorative rounds.
Advanced Techniques for Impressive Results
Scroll work demands patience and fine blades. You create intricate patterns in thin wood. Slow speeds and zero orbital action give maximum control. Practice on scrap to develop smooth movements.
Cutting metal requires special preparation. Use cutting oil to cool the blade. Lower speeds prevent overheating. Clamp material securely and let the blade work slowly. Bi-metal blades last longest in tough materials.
Additionally, pocket cuts combine plunge and straight techniques. You create openings for electrical boxes or vents. Mark carefully and support the waste piece to avoid tear-out.
Combine techniques for complex shapes. Rough cut first, then refine with finer blades. Multiple passes improve accuracy in thick materials. These skills elevate your projects from basic to professional.
Essential Accessories and Gear
Clamps hold everything steady. Quick-grip styles adjust fast. Edge guides ensure straight cuts over long distances. Parallel guides help with rip cuts along edges.
Dust collection attachments keep your area clean. Some connect to shop vacuums. Splinter guards reduce tear-out on delicate surfaces. Anti-splinter inserts fit into the base plate.
Moreover, blade storage cases organize your collection. Good work lights illuminate cut lines. Hearing protection and respirators add comfort during long sessions.
Invest in quality accessories. They expand what your jig saw can do and improve safety. Start with basics and add as your projects grow.
Common Mistakes and How to Avoid Them
Forcing the blade causes burns and rough cuts. Let the tool cut at its own speed. Guide it gently instead of pushing hard. This habit extends blade life too.
Wrong blade selection leads to poor results. Match teeth and material every time. Change blades when they dull for cleaner cuts.
Additionally, poor material support creates vibration. Clamp securely and support large pieces. This prevents binding and kickback.
Skipping safety gear invites injury. Always protect eyes, ears, and lungs. Secure hair and clothing. These habits become second nature with practice.
Finally, rushing leads to mistakes. Take your time on each cut. Measure twice and cut once. Patience produces better finished projects.
Creative DIY Projects to Try with Your Jig Saw
Build custom shelves with curved brackets. Cut plywood shapes and assemble with brackets. Paint or stain for a unique look.
Create wooden signs for your home. Cut letters freehand or with stencils. Add paint and hang proudly.
Furthermore, make puzzle pieces for kids. Draw patterns on thin wood and cut carefully. Sand smooth for safe play.
Construct garden planters with decorative sides. Cut waves or patterns in pressure-treated wood. Assemble and fill with soil.
These projects build skills and confidence. Start simple and progress to more complex designs. Your jig saw handles them all.
Maintenance Tips for Long-Lasting Performance
Clean your jig saw after each use. Remove sawdust from vents and blade area. Wipe the base plate to keep it smooth.
Lubricate moving parts occasionally. Check cords for damage on corded models. Store batteries properly for cordless ones.
Moreover, inspect blades regularly. Replace dull or damaged ones immediately. Store the tool in a dry place away from dust.
Follow manufacturer guidelines for service. Tighten loose screws and check alignment. Proper care keeps your jig saw running smoothly for years.
Conclusion
You now know how to use a jig saw safely and effectively in DIY projects. Master the basics first, then try advanced techniques. Choose the right blades and gear for each job. Practice regularly to improve your skills.
Pick up your jig saw today and start a new project. Build something you love with your own hands. Share your creations and inspire others. Happy cutting!
FAQs
What is the best blade for cutting plywood without splintering?
Use a fine-tooth blade with downward-cutting teeth or add painter’s tape over the cut line. An anti-splinter insert in the base plate helps too.
Can I cut metal with a regular jig saw?
Yes, but use bi-metal blades designed for metal. Apply cutting oil and run at lower speeds for best results.
How do I make straight cuts with a jig saw?
Clamp a straightedge as a guide. Keep the base plate flat and move steadily along the edge.
Is a corded or cordless jig saw better for beginners?
Corded models offer consistent power and no battery worries. They suit most beginner projects in a workshop setting.
How often should I change jig saw blades?
Change them when cuts become rough or require extra pressure. Dull blades work harder and produce poor results.
References
- Harvard Joint Center for Housing Studies: https://www.jchs.harvard.edu/sites/default/files/reports/files/Harvard_JCHS_Improving_Americas_Housing_2025.pdf
- Occupational Safety and Health Administration: https://www.osha.gov/etools/woodworking/production/machines-tools/jig-saw
- Lowe’s How to Use a Jigsaw: https://www.lowes.com/n/how-to/using-a-jigsaw
- WOOD Magazine Jigsaw Blades Guide: https://www.woodmagazine.com/tool-reviews/jigsaws/choosing-jigsaw-blades